ReviewBoard 2.0.15をCentOS7へインストールする
プレコミットレビューができる環境を構築したいという事でReviewBoardをインストールしてみます。
「コミットする前にレビューを行って、よければコミットしましょう!」という運用になるかと思います。
ReviewBoardのインストール
ここでは、インストールマニュアルやHow to install Review Board on a CentOS 7 VPSを参考にインストールした手順を記録します。
よく理解できていない部分もあります・・・(ひきつづき整理が必要ですね)
システムの更新
最初にパッケージを更新しておきます。
# yum update
MariaDB(MySQL)のインストール
ReviewBoardでは、MySQLとPostgreSQL,sqlite v3がサポートされているようです。
ここでは、MariaDB(MySQLから派生して開発されている)をインストールします。
# yum install mariadb-server
エディタで/etc/my.cnf を開き、[mysqld]セクションにcharacter-set-server=utf8と[mysql]セクションにdefault-character-set=utf8を追加します。
[mysqld]
datadir=/var/lib/mysql
socket=/var/lib/mysql/mysql.sock
# Disabling symbolic-links is recommended to prevent assorted security risks
symbolic-links=0
# Settings user and group are ignored when systemd is used.
# If you need to run mysqld under a different user or group,
# customize your systemd unit file for mariadb according to the
# instructions in http://fedoraproject.org/wiki/Systemd

character-set-server=utf8

[mysqld_safe]
log-error=/var/log/mariadb/mariadb.log
pid-file=/var/run/mariadb/mariadb.pid

#
# include all files from the config directory
#
!includedir /etc/my.cnf.d

[mysql]
default-character-set=utf8
設定後、データベースの起動と自動起動の設定を行います。
# service mariadb start
# systemctl enable mariadb
MariaDBのセキュリティ向上のため、mysql_secure_installationを実行してrootパスワードの設定や不要なデータベースの削除を行います。
# mysql_secure_installation
/usr/bin/mysql_secure_installation: line 379: find_mysql_client: command not found

NOTE: RUNNING ALL PARTS OF THIS SCRIPT IS RECOMMENDED FOR ALL MariaDB
      SERVERS IN PRODUCTION USE!  PLEASE READ EACH STEP CAREFULLY!

In order to log into MariaDB to secure it, we'll need the current
password for the root user.  If you've just installed MariaDB, and
you haven't set the root password yet, the password will be blank,
so you should just press enter here.

Enter current password for root (enter for none): (そのままEnterキーを押す)
OK, successfully used password, moving on...

Setting the root password ensures that nobody can log into the MariaDB
root user without the proper authorisation.

Set root password? [Y/n] y
New password:  (MariaDBのrootユーザーに新たに設定するパスワードを入力)
Re-enter new password:  (新パスワードを再入力)
Password updated successfully!
Reloading privilege tables..
 ... Success!


By default, a MariaDB installation has an anonymous user, allowing anyone
to log into MariaDB without having to have a user account created for
them.  This is intended only for testing, and to make the installation
go a bit smoother.  You should remove them before moving into a
production environment.

Remove anonymous users? [Y/n] y  (匿名ユーザーを削除)
 ... Success!

Normally, root should only be allowed to connect from 'localhost'.  This
ensures that someone cannot guess at the root password from the network.

Disallow root login remotely? [Y/n] y  (rootユーザーの接続元をlocalhostに限定)
 ... Success!

By default, MariaDB comes with a database named 'test' that anyone can
access.  This is also intended only for testing, and should be removed
before moving into a production environment.

Remove test database and access to it? [Y/n] y  (testデータベースを削除)
 - Dropping test database...
 ... Success!
 - Removing privileges on test database...
 ... Success!

Reloading the privilege tables will ensure that all changes made so far
will take effect immediately.

Reload privilege tables now? [Y/n] y  (権限関係の変更を直ちに適用)
 ... Success!

Cleaning up...

All done!  If you've completed all of the above steps, your MariaDB
installation should now be secure.

Thanks for using MariaDB!
MariaDBにデータベースとユーザーを作成します。
# mysql -u root -p

MariaDB> create database reviewboard;
MariaDB> grant all on reviewboard.* to reviewboard@localhost identified by 'STRONG_PASSWORD';
\q
Apacheのインストール
ReviewBoardは、Apacheとmod_wsgiまたはfastcgi,mod_pythonの組み合わせかlighttpdとfastcgiの組み合わせで動作します。
ここでは、Apacheとmod_wsgiの組み合わせでインストールしていきます。
# yum install httpd mod_wsgi
Apacheの起動と自動起動の設定を行います。
# service httpd start
# systemctl enable httpd
オプションとしての設定となりますが、いろいろな情報を与えないようにApacheの設定をしておきます。(必要な場合)
# vi /etc/httpd/conf.d/options.conf

TraceEnable off

ServerSignature Off

ServerTokens Prod
設定後、Apacheを再起動します。
# apachectl configtest
Syntax OK

# systemctl restart httpd
ReviewBoardのインストール
ReviewBoardは、EPELリポジトリで提供されているとあるのでEPELリポジトリを有効にします。(EPELってなに?)
# yum install epel-release.noarch
EPELリポジトリを必要なときのみ使用するよう、設定を変更しておきます。
# vi /etc/yum.repos.d/epel.repo

[epel]
enable=0 (1から0へ変更)
EPELリポジトリからReviewBoardをインストールします。
# yum --enablerepo=epel install ReviewBoard
私の環境では、次のメッセージが表示されインストールできなかった為、リポジトリの設定を変更します。
One of the configured repositories failed (unknow),and yum doesn't have
enough cached data to continue. At this point the onlysafe thing yum can
do is fail. There are a few ways to work "fix" this:

Cannot retrieve metalink for repository: epel/x86_64. Please verify its
path and try again
「/etc/yum.repos.d/epel.repo」ファイルにあるbaseurlのコメントを外して、mirrorlistをコメントアウトします。
[epel]
name=Extra Packages for Enterprise Linux 7 - $basearch
baseurl=http://download.fedoraproject.org/pub/epel/7/$basearch
#mirrorlist=https://mirrors.fedoraproject.org/metalink?repo=epel-7&arch=$basearch
failovermethod=priority
enabled=0
gpgcheck=1
gpgkey=file:///etc/pki/rpm-gpg/RPM-GPG-KEY-EPEL-7
設定ファイルを修正後、「# yum –enablerepo=epel install ReviewBoard」を実行します。
ReviewBoardは、memcached(分散キャッシュサーバ)を使用するという事なので、この辺もインストールしていきます。
# yum install memcached
# easy_install python-memcached
# systemctl enable memcached
rb-site installコマンドを実行してReviewBoardサイトを作成します。
# rb-site install /var/www/html/reviewboard
対話形式でReviewBoardの設定を行っていきます。
Domain Name: ドメイン名
Root Path [/]: /
Database Type: 1
Database Name [reviewboard]: reviewboard
Database Server [localhost]: localhost
Database Username: reviewboard
Database Password: STRONG_PASSWORD
Confirm Database Password: STRONG_PASSWORD
Memcache Server [localhost:11211]: localhost:11211
Username [admin]: admin
Password: YOUR_ADMIN_PASS
Confirm Password: YOUR_ADMIN_PASS
E-Mail Address: youremail@domain.com
インストール完了後、権限を設定します。
# chown -R apache: /var/www/html/reviewboard
ApacheがReviewBoardを参照できるよう、設定ファイルをコピーします。
# cp /var/www/html/reviewboard/conf/apache-wsgi.conf /etc/httpd/conf.d/
# apachectl configtest
# systemctl restart httpd
以上でインストールが完了します。firewallの設定(http)は出来ている前提となります。
インストール後、ブラウザーでアクセスしてReviewBoardのサイトが表示されれば成功なのですが、私の環境ではBad Request(400)と表示され動作しませんでした。
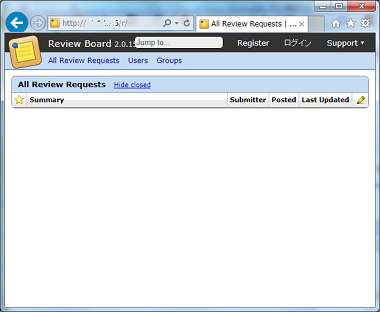
インストールが成功していれば、次のような画面が表示されます。
なぜか動作した
理由はわかっていないのですが、エラー箇所を特定できないかとReviewBoardの設定を変更したところ動作するようになりました。
ReviewBoardのディレクトリ内にあるsettings_local.pyのDEBUGをTrueに変更したところブラウザに表示されるようになりました。(ここでは、/var/www/html/reviewboard/conf/settings_local.py)
# Extra site information.
SITE_ID = 1
SITE_ROOT = '/'
FORCE_SCRIPT_NAME = ''
DEBUG = True (この部分をFalseからTrueへ変更)